Skip to content
English
  • There are no suggestions because the search field is empty.

Resolve Failed Scans


Role: Account Holder, Administrator, or Teacher


When a scan fails, the Scan Session Details page provides the reason. The sections below detail various ways that scans fail and provide instructions to resolve these failed scans.

Student Scan Cannot Be Identified

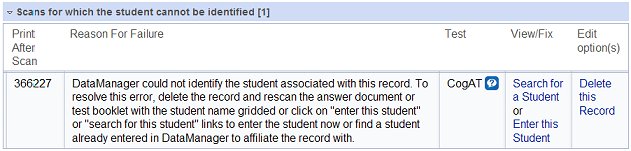
Student scans fail because the student name and/or ID circles are not marked, the student name and/or ID circles are marked incorrectly, or the student has not been added to the student roster in DataManager. When a student’s scan fails, the Scan Session Details page displays a section titled Scans for which the student cannot be identified. If there are no failed student scans, you will not see this section.

To correct a failed student scan:

1.   Click the Scans for which the student cannot be identified section heading to see the list of student records that cannot be identified.

2.   Locate and review the student answer document corresponding to the failed scan.

3.   Refer to the table below to resolve the failed scan(s).

To do the following... Follow these instructions...

Delete this student record from the scanning session

    1. In the Edit option(s) column, click Delete this Record to delete the scanned student record. A dialog box appears asking you to confirm the deletion.
    2. Click Yes.
    3. Complete the student name and identification number on the answer document and rescan the student answer document in another scanning session.

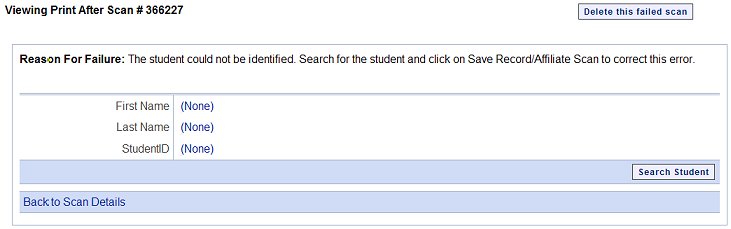
Search for the unidentified student in the roster

    1. In the View/Fix column, click Search for a Student to locate a student already in the roster to match to this scan. A Viewing Print After Scan page appears.
    2. Enter a name in the First Name or Last Name field or enter a student identification number in the StudentID field, and then click Search Student. The student records that match your entry will appear in a list below these fields.
    3. In the Actions column of the row containing the student to be associated with the scan, click the Save Record/Affiliate Scan button.

Add this student to the roster

    1. In the View/Fix column, click Enter this Student to add the student to the roster. A Viewing Print After Scan page opens.
    2. In the Location/Class list, select the location level to which you want to assign the student. You must assign the student to a class-level location. Click the right arrow () to expand the hierarchy. Click the down arrow () to collapse the hierarchy. The Grade field automatically displays the grade number based on the class-level location.
    3. For the First Name and Last Name fields, click (None), and then type the student's first and last names.
    4. In the Unique Student Id field, click (None), and then type a unique student identification number in the box. The unique student ID may be up to 10 characters in length. You may use any combination of the following characters:
      1. –      A–Z
      2. –      0–9
      3. –      Blanks or dashes
    5. In the DOB (MM/DD/YYYY) field, click (None), and then type the student's date of birth. You must enter the date of birth in MM/DD/YYYY format.

      Note: If you enter a date of birth that is out of range for obtaining age-based scores, a warning message appears. Verify the date of birth you entered is correct.

    6. In the Gender field, click (None), and then select the student's gender.
    7. (Optional) In the Ethnicity - Hispanic or Latino field, click (None), and then select Y or N to indicate if the student is Hispanic or Latino.
    8. (Optional) In the Race field, click (None), and then select all applicable races.
    9. (Optional) In the Program Codes field, click (None), and then select the program codes that apply to the student.
    10. Click the Save Record/Affiliate Scan button to affiliate this student record to the scan.
4.   After you have saved your changes, do one of the following:
    1. Resolve the next failed student scan in the list.
    2. Click Back to Scan Details to go back to the Scan Session Details page. See Viewing the Scan Session Details Page

Other Failed Test Scans

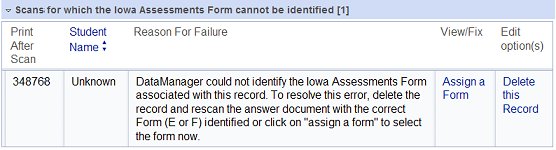
When a test fails to scan correctly, the Scan Session Details page displays a section titled Scans for which <reason for failed scan stated here>. If there are no failed test scans, you will not see this section.

To correct a failed test scan:

1.   Click the Scans for which <reason for failed scan stated here> section heading to see the list of records that failed.

2.   Locate and review the student answer document corresponding to the failed scan.

3.   Refer to the table below to resolve the failed scan(s).

If the reason for failure is: Do the following:

Location assignment could not be identified

    1. In the Edit option(s) column, click Delete this Record to delete the scanned record. A dialog box appears asking you to confirm the deletion.
    2. Click Yes.
    3. Complete the location assignment for this answer document including the corresponding header sheets (Building Identification Sheet and Grade/Class Identification Sheet) and rescan the student answer document in another scanning session.

Iowa Assessments Form cannot be identified

    1. Click the Scans for which the Iowa Assessment Form cannot be identified section heading to see the list of student records.
    2. In the View/Fix column, click Assign a Form. A Viewing Print After Scan page appears.
    3. Select the form of the test that was administered (Form E or Form F) and click Save Changes for this Record to apply the change to the current record or Save Change/Apply to All Record in this Category to apply the change to all the records listed in this section.

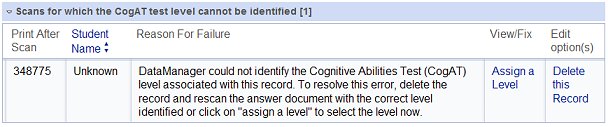
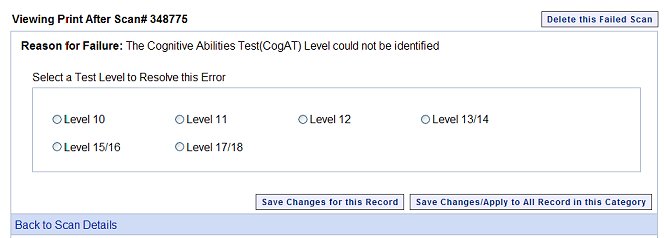
CogAT level cannot be identified

    1. Click the Scans for which the CogAT test level cannot be identified section heading to see the list of student records.
    2. In the View/Fix column, click Assign a Level. A Viewing Print After Scan page appears.
    3. Select the level of the test that was administered and click Save Changes for this Record to apply the change to the current record or Save Change/Apply to All Record in this Category to apply the change to all the records listed in this section.

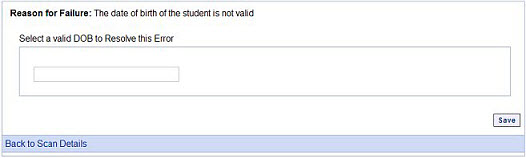
Student date of birth not identified

    1. Click the Scans for which the Student's Date of Birth cannot be identified section heading to see the list of student records.
    2. In the View/Fix column, click Assign a DOB. A Viewing Print After Scan page appears.
    3. Enter the correct date of birth for the student in the proper format (MM/DD/YYYY) and click Save.

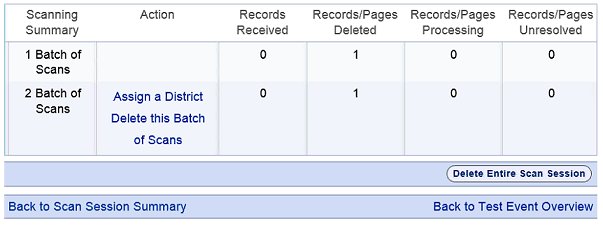
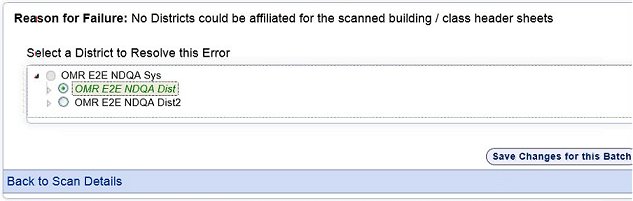
District not assigned

    1. In the Action column of the Scanning Summary area, click Assign a District. A Viewing Print After Scan page appears.
    2. Select a district from the hierarchy and click Save Changes for this Batch.

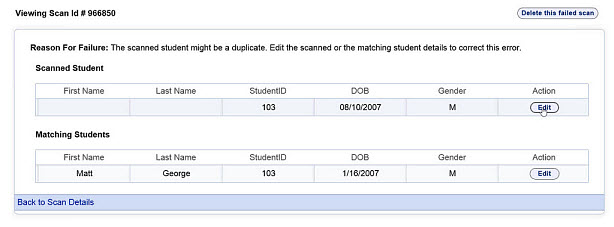
Scans with duplicate students

    1. Click the Scans with Duplicate Students section heading to see the list of student records.
    2. In the View/Fix column, click Resolve Duplicates to edit or delete the duplicate student record. A Viewing Scans ID page appears.
    3. Locate the line containing the student record to be edited or deleted and click the Edit button. The Edit Duplicate Student's Data box appears.
    4. Do one of the following:
      1. To edit the student data record, type the student's data, such as last name, first name, or student identification, and then click the Save Student button.
      2. To delete the student data record, click the Delete this Failed Scan button.


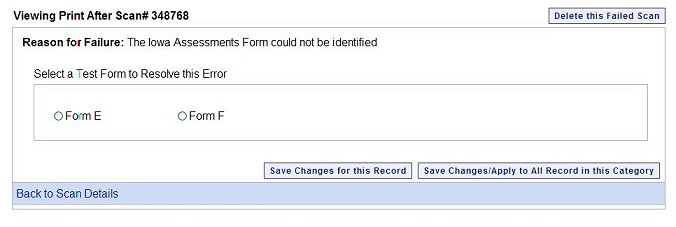
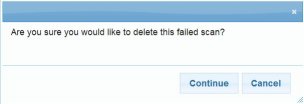
A confirmation box opens.

4.   Do one of the following:
    1. If you are saving changes, click Save.
    2. If you are deleting the scan, click Continue.


Note: If you delete the scan, correct the reason for the failed scan on the answer document and rescan the answer document in another scanning session.


5.   After you have saved your changes, do one of the following:

    1. Resolve the next failed test scan by using the navigation arrows at the top of the page.
    2. Click Back to Scan Details to go back to the Scan Session Details page. See View the Scan Session Details Page.