
Role: Account Holder, Administrator
OMR customers scan answer documents into a single data file that is sent to Riverside Insights Scoring Service.
Prior to scanning, your scanner, software, and ScanTools® must be installed and configured to the specifications laid out in About Preparing for Scanning. If you are using barcode labels, you should roster students at least one week in advance to ensure the labels are available for printing.
| Important: |
If you are creating rosters from header sheets and answer documents (rather than barcode labels), the answer documents are not being verified for accuracy. Any of the following issues will cause the import of the scan session to fail:
|
Note: Always use the ScanTools software to control the scanner. Do not press the buttons on the scanner. ScanTools interfaces with the scanner and notifies you when scanning is complete.
To scan answer documents:
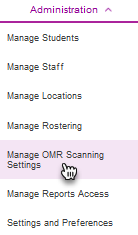
1. Click Administration in the DataManager header, then select Manage OMR Scanning Settings.
The Manage Settings page opens.

2. Download the Scandef file required for scanning. (Click the Download link for the scanning software you are using, ScanTools® Plus or ScanTools® Prisma™, in the upper right corner of the page.)
Note: This scandef file is specific to DataManager and must be downloaded as part of your initial OMR administrative setup and whenever a new form is added to OMR.
3. Place the first batch of answer documents into the scanner’s feed tray, as follows:
-
- If your batch contains answer booklets, set the batch of answer documents in the scanner so that each answer document scans backward—from the last page (the page containing the student’s name, identification number, and demographic information) to the first page.
- Align the timing marks on the side of the answer documents with the indicated marks on the scanner's feed tray.
- If you are using an OpScan® scanner and using barcodes, verify that the red light in the barcode reader attachment is pointed directly at the answer documents' barcodes.
4. In the ScanTools Application list, select the scandef file, which has a file extension of .StxAppDef, and scan your answer documents.
5. On your computer's file manager, locate and rename the file containing the scanned documents, as follows:
-
- Find the file that was generated during the scan session. This file has a .dat extension and is stored on your computer in the ScanTools Plus\Applications folder or the ScanTools Prisma\Applications folder.
- Rename the file using a unique file name that allows you to distinguish it from other scan sessions.
Important: The file extension (.dat) must not be changed.
Note: To ensure that each file is scored separately, you must rename each .dat file with a unique file name. If you do not rename the file, the next scan session is added to this same file.
6. When your scanning is completed, sign in to DataManager and locate your scanning session as follows:
-
- Select Test Events from the Assessments header or site map (or from the card on the Overview page).
- Find the test event to which your session belongs and click its test event name or the Manage link in the Actions column.
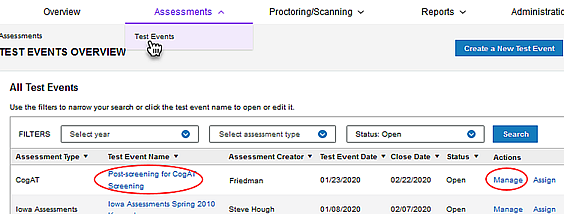
The Test Event page for that event opens.
- In the Complete Tasks column, click Scan OMR answer documents. The Scan Answer Documents page opens.
-
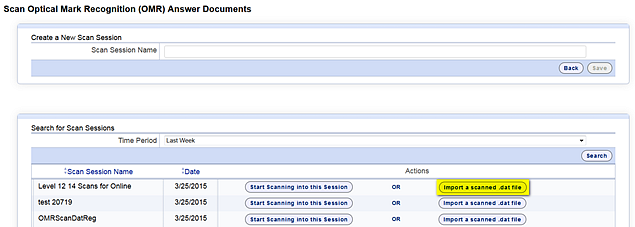
- Display scan sessions according to time period by selecting an option in the Time Period list and clicking Search. The scan sessions that were created within the selected time period appear.
- Sort the scan session list by clicking the arrows in the Scan Session Name column or the Date. The list of scan sessions is displayed in ascending or descending order.
- In the Scan Session Name box, scroll through the list to find the scan session to which you want to import your file.
- In the Actions column of the line containing the session to be scanned, click Import a scandef.dat file.
An Offline Scan Import page appears.
7. Locate and select the .dat file to be imported and click Import.

After the file has been imported, a message appears stating whether the file imported successfully.
8. Do one of the following:
- If the import is successful, see About Viewing Scanning Results for details about viewing and accessing the imported scanning results.
Note: The message stating that the import was successful also states the number of records that were scanned. This record total counts building and class header sheets as records, unlike the record total displayed on the Scan Session Summary page, which only counts student records. For example, if five student records are successfully scanned along with two header sheets, then the import message states “number of records scanned: 7.” However, in the Records Received column on the Scan Session Summary page, the total displayed is 5.
- If the import is not successful, verify that the answer documents are properly prepared for scanning, rescan the answer documents, and import the file again.