
Data Package: Online Testing or DataPlus
Role: Account Holder, Administrator, Teacher, or Digital Resource & Reporting Access
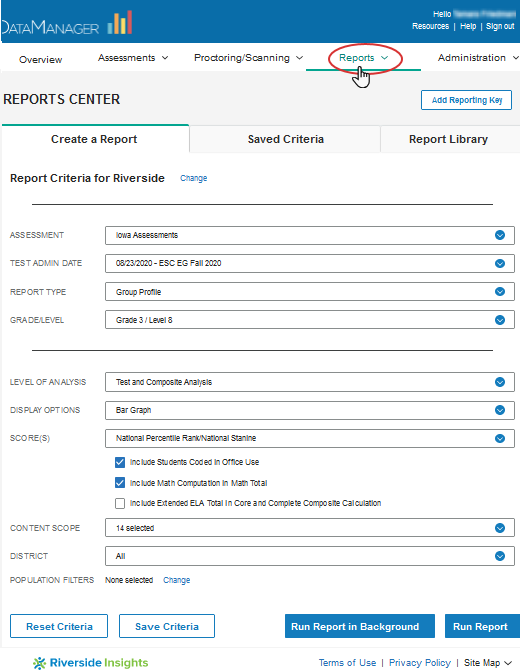
You can specify criteria and run Georgia Milestones Assessment System (GMAS) reports on the Create a Report page.
Report options and availability vary according to the following:
- Your role and location. You can create and view reports only for your own location level and those below you.
- Prerequisite administration of Iowa Assessments. Iowa Assessments Complete or Core batteries for grades/levels 3/9 to 8/14 must have been administered to students. Iowa Assessments Survey tests cannot be used for GMAS reporting, nor can off-level testing.
- The options you select as you move down the list of criteria. As you select options, subsequent fields with dependencies on those options may change. (A selection of Grade 5 / Level 11, for example, will add Social Studies and Science to the CONTENT SCOPE menu.) When this happens, the page reloads to display new or adjusted fields.
To create a GMAS report:
1. Open the Create a Report tab in the Reports Center by doing one of the following:
- If you are a Teacher, Administrator, or above, click the Reports menu at the top of the page at any point after signing in. Select Classic if provided a drop-down option.
Note: If your institution has purchased CogAT, you will also see the option to select the CogAT Dashboard. For instructions, see the related introduction and help section.
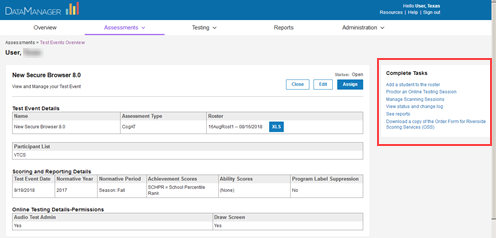
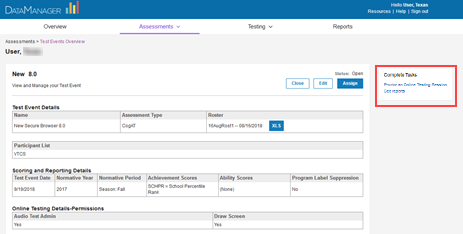
- For individuals with Teacher roles and above, you can also open the Create a Report tab from the Test Events Overview page by clicking See reports in the Complete Tasks box.
Test Events Overview: Admin View
Test Events Overview: Teacher View
- For reports-only access users, using a web Reporting Key,create your account or sign in to your existing account and enter the Reporting Key. If you have access to multiple locations, enter each new Reporting Key once. Subsequently, you can select the location from a Select Report Criteria for drop-down list at the top of the Create a Report tab.
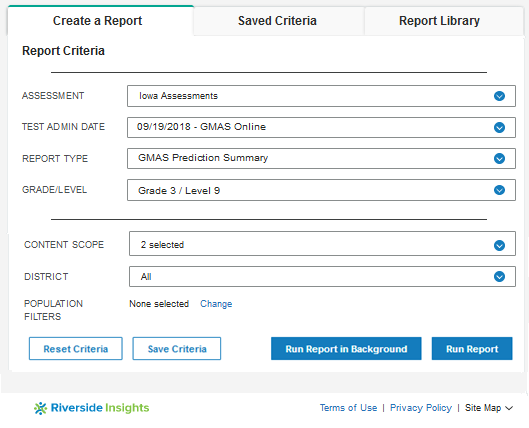
2. In the ASSESSMENT list, select the test your students took. If there is more than one option, select the one for which you want to run a report.
3. From the TEST ADMIN DATE list, select your test event. Test events are indicated by their date and name. They are sorted by date, most recent first.
4. In the REPORT TYPE list, select one of the two available GMAS reports at the top:
GMAS Prediction Summary
The Georgia Milestones Assessment System (GMAS®) Prediction Summary report shows a four-level performance-band prediction for Georgia students grades 3 - 8 who have tested on-level using the Iowa Assessments. Students' predicted scores are aggregated and reported for up to four content areas: Reading, Mathematics, Social Studies, and Science.
The header of each page provides the report scope and test information, including some or all of the following: assessment, form, test date, norms, grade, and level.
The body of the report displays pie charts of four achievement levels associated with GMAS: (1) Beginning Learners (2) Developing Learners (3) Proficient Learners (4) Distinguished Learners. The legend includes the number and percent of students who scored in each achievement category.
To view the specific students included in an achievement level, click the number or percent value for any level. A roster report opens for the students in that level. From there, you can click individual student names to view detailed information and scores.
GMAS Student Roster
The Georgia Milestones Assessment System (GMAS®) Student Roster report displays individual student scores for Georgia students grades 3 - 8 who have tested on-level using the Iowa Assessments. Scores on the GMAS Student Roster report can include core reading and/or math scores for all eligible grades/levels and social studies and science for grades 5 and 8. You can run the report from the Create a Report page or access it through the GMAS Prediction Summary report.
The header of each page provides the report scope and test information, including some or all of the following: assessment, form, test date, norms, grade, level, and location.
Within the report, the first column of each row contains entries for the following: student's name, ID number, secondary student ID (if applicable), birth date, age, program, level, form, administration mode, gender, and administrator code (if applicable). The remaining columns in the row provide each student's scores for the Iowa Assessments batteries administered.
Note: Student Rosters display a maximum of 25 students per page.
You can click a student's name within the report to open the profile for that student. The profile page shows the student's National Percentile Rank (NPR) score. From here, you can view information about a test by holding your cursor over the test category (Mathematics in the example below). To see a skill-based breakdown of the student's scores, click the Reading or Mathematics link in the score column.
The report criteria below the Display Type field are updated with relevant fields and default values. For example, the GRADE/LEVEL field shows selections for all Iowa Assessments events that have been completed and that meet the GMAS requirements for reporting (grades 3-8, on-level, Complete or Core).
5. Use the following table to enter the remaining report criteria.
|
Field |
Selections |
Description |
|
|
GRADE/LEVEL |
Select one:
|
Grades must correspond to levels, as listed here, and must have been taken as Complete or Core batteries. Off-level test administrations do not appear as options for GMAS reports. Only those grades and levels that were tested appear here for selection. |
|
|
SCORE(S) Student Roster report only |
Select 1 - 3 of the following:
|
For more information on GMAS scores, see GMAS Score Descriptions. See SCORE FILTERS below for instructions on how to restrict results by score or score range. |
|
|
Students Coded in Office Use |
|
Refers to the "Office Use Only" section of a student answer document. Identifies students whose test scores should be included (Overrides exclusions; those test scores marked for exclusion will be used in computing group averages.) or excluded (Test scores marked for exclusion will not be used in computing group averages; those test scores will be reported on individual student score reports.) from group averages. |
|
|
CONTENT SCOPE |
1 or more of the following:
|
Select one or more to view targeted skills on the report. Social Studies and Science are only available for grades 5 and 8. |
|
|
REGION/SYSTEM/DISTRICT/ BUILDING/CLASS |
|
Determines the population scope of your report. The field name depends on your setup and permissions (for example, BUILDING if you are a Building or School Administrator). If you select a specific location, a new sub-level field opens below. This continues for all available locations (down to the level of CLASS). |
|
|
POPULATION FILTERS |
4 categories, 1 selection allowed for each.
|
Narrows results by gender, ethnicity, program (such as IEP or Gifted), and/or administrative code. |
|
|
SCORE FILTERS Student Roster report only |
Narrows results based on item or percentile scores. |
||
Score Filters
a. For the SCORE FILTERS field, click Change. The filter box appears with filter options available for the report. These options vary depending on the type of report.

b. In the SCORE list, select the specific score type to use as a filter for the test results.
Note: Lexile is not available for filtering because it is represented by a range.
c. In the CONTENT AREA list, select one of the skill domains.
d. Select a relational operator (is equal to, is greater than, for example) from the COMPARISON list and type a VALUE in the box.
e. (Optional) Specify one or two additional filters by selecting AND or OR in the AND/OR list and repeating steps b - d.
Note: Selecting AND adds the additional filter requirement to the previous filter(s); the results contain only those values that meet both filter requirements. (For example: If your filter states “greater than 40 AND less than 50,” then the results include only values between 41 and 49.) Selecting OR includes the additional filter results together with the results of the previous filter(s); the results contain those values that meet either of the filter requirements. (For example: If your filter states “greater than 90 OR less than 10” on a scale of 0 to 99, then the results include values 91 to 99 and values 0 to 9.)
f. Click Apply to apply the filters to the report. To remove or cancel the filter(s), click Cancel.
6. (Optional) ![]() Save the current selection criteria for future use.
Save the current selection criteria for future use.
a. Click the Save Criteria button in the lower left corner of the page . A Save Criteria box opens. The report name defaults to the Report Type you selected.
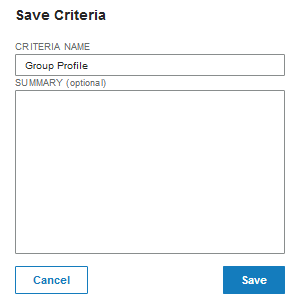
b. Type in the CRITERIA NAME box to change or add to the name of the saved criteria. To add a description, use the SUMMARY box
Note: The CRITERIA NAME can be a maximum of 80 characters. The SUMMARY can be a maximum of 255 characters.
c. Click Save.
- If the report name does not already exist, a confirmation message appears at the top of the page. Continue to step d.
- If the report name does already exist, a Report Name Exists box appears.
Do one of the following:
- To change the selection criteria that were saved under this report name with the updated selected criteria, click Yes. A confirmation dialog box appears. Continue to step d.
- To retain the selection criteria that were saved under this report name and save the updated selection criteria under a new report name, click No. A Save Report Criteria dialog box opens with an empty Report Name box. Return to step b.
d. Click OK. The saved selection criteria is available on the Load/Manage Criteria page. For more information, see Loading and Managing Saved Criteria .
7. Run the report using one of the following options.
|
To do the following... |
Follow these instructions... |
|
Run the report immediately as you wait. |
a. Click Run Report. A progress bar appears. When the report has finished running, it appears on a report page. b. See View Reports for information about the report page.
|
|
Submit the report to run in the background. |
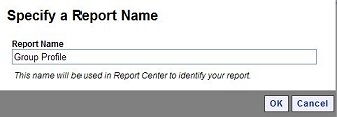
a. Click Run in Background. A Specify a Report Name dialog box opens. The report name defaults to the Report Type.
b. (Optional) Change or add to the Report Name.
c. Click OK. A confirmation box informs you that the job has been submitted successfully. d. Click OK. The report is submitted. When it is finished running, you can open it in the Report Center . e. See Using the Report Center for information about retrieving reports.
|
See Also: