
Data Package: Online Testing
Role: Account Holder, Administrator, Teacher, or Proctor
Creating test sessions is the final step in the sequence that begins with setting up an account for your entire system, district, or diocese, entering roster information for all students, teachers, classrooms, and buildings, creating test events, and creating test assignments.
For test sessions, begin by setting up a Getting Started tutorial for your assessment type. Then create the first test in a series. In most cases, subtests within a test family are automatically linked so that students can continue testing from one to the next without having to sign in each time. After students complete a subtest, you can allow them to continue to the next subtest or you can end testing for the day. (See Continue or End a Session.)
Note: For instructions on how to verify which tests students have completed, see Look Up a Student.
Use the table below to determine when to create a specific test session:
Important: Once you have created a test session for a test event and assignment, the encompassing event and assignment cannot be edited. See the online help for Assessments for more information about test events and assignments.
To create a test session:
1. Sign in to the DataManager Proctor application.
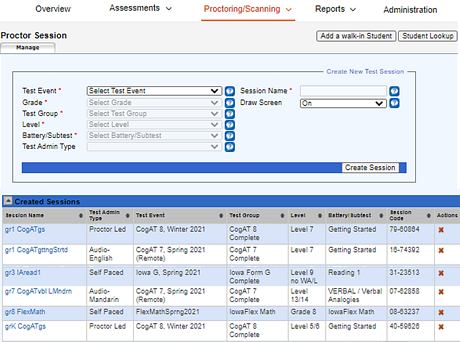
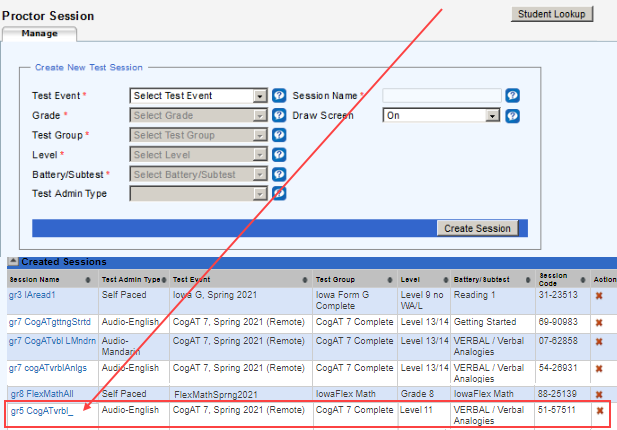
The Proctor Session page opens to the Manage tab. Existing test sessions are listed on the lower part of the page. The form for creating new test sessions is located in the upper portion of the page.
2. Select the Test Event to which your session belongs. If you do not know the test event and there is more than one option in the drop-down menu, consult your test coordinator or administrator. See About Test Events for more information about test events.
The test event you select determines the options for the fields that follow.
3. Select options from the drop-down menus for Grade, Test Group, Level, and Battery/Subtest.
Note: The batteries and subtests are listed in their recommended order.
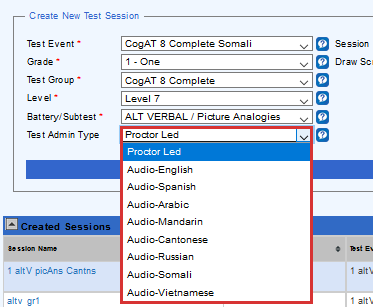
4. In the Test Admin Type list, select the test administration type for the test.
|
Test Admin Type |
Assessment Type |
|
|
Proctor-led |
|
|
|
Self-paced |
|
|
|
Audio English |
CogAT |
|
|
Audio Spanish |
||
| Note: If you do not have the option of selecting one or more of the additional languages below, check with your Account Holder or Administrator to ensure that these options were selected during the initial account configuration and again when setting up the associated test event. | ||
|
Audio Arabic |
CogAT
Note: Written instructions appear on upper-level students' screens for each audio language, including Spanish, in tandem with the audio instructions. If you want students at the upper levels to test using only the written instructions that appear on their screens, you must select the language here, then disable the audio device. |
|
|
Audio Chinese-Mandarin* |
||
|
Audio Chinese-Cantonese* |
||
|
Audio Russian |
||
|
Audio Somali |
||
|
Audio Vietnamese |
||
* Chinese Mandarin and Chinese Cantonese should be treated as two different languages. Your selection should reflect the audio language of your student population.
- Enabled audio testing during the initial configuration of your account.
- Selected the audio language(s) you require in the Settings and Preferences section of the Administration tab.
- Enabled Allow Audio Test Administration for the test event.
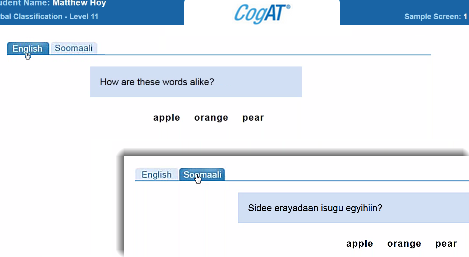
Sample translated test question.
When you allow testing in one of the additional languages, students have the option of viewing the test directions in English or in the alternate language. They can toggle between the two languages. The items themselves remain in English.
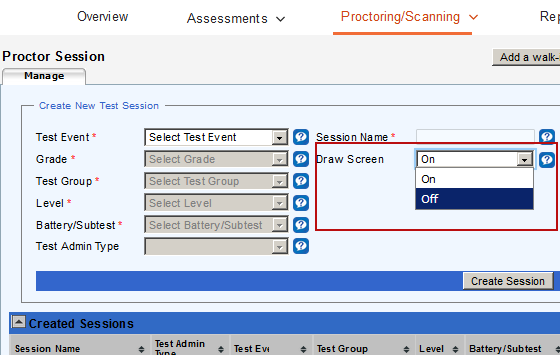
5. In the Session Name field, type a session name that conforms to a naming convention that your school or district has determined, such as the last name of the teacher, the grade, and the subject (for example, Hanson 4 Math). The session name must be unique for the test event.
6. Select additional options, as available:
- If you have the Draw Screen option on your form, select On to allow students access to a sketching page while they wait for a test to begin. Select Off to have those students see a static screen with their name on it and no drawing tools.
7. Click Create Session. Your session appears in the Created Sessions area and is ready for you or another staff member to proctor.
See Also: